Manual

This manual explains the basic staking flows on Oasys Staking: Stake, Unstake, Restake, Claim, and Withdraw.

The Validators page is where you start Stake, Unstake, Restake, and Claim. The My Account page is where you check your staking status and withdraw tokens after the unstaking period.

1. Stake

Step 1

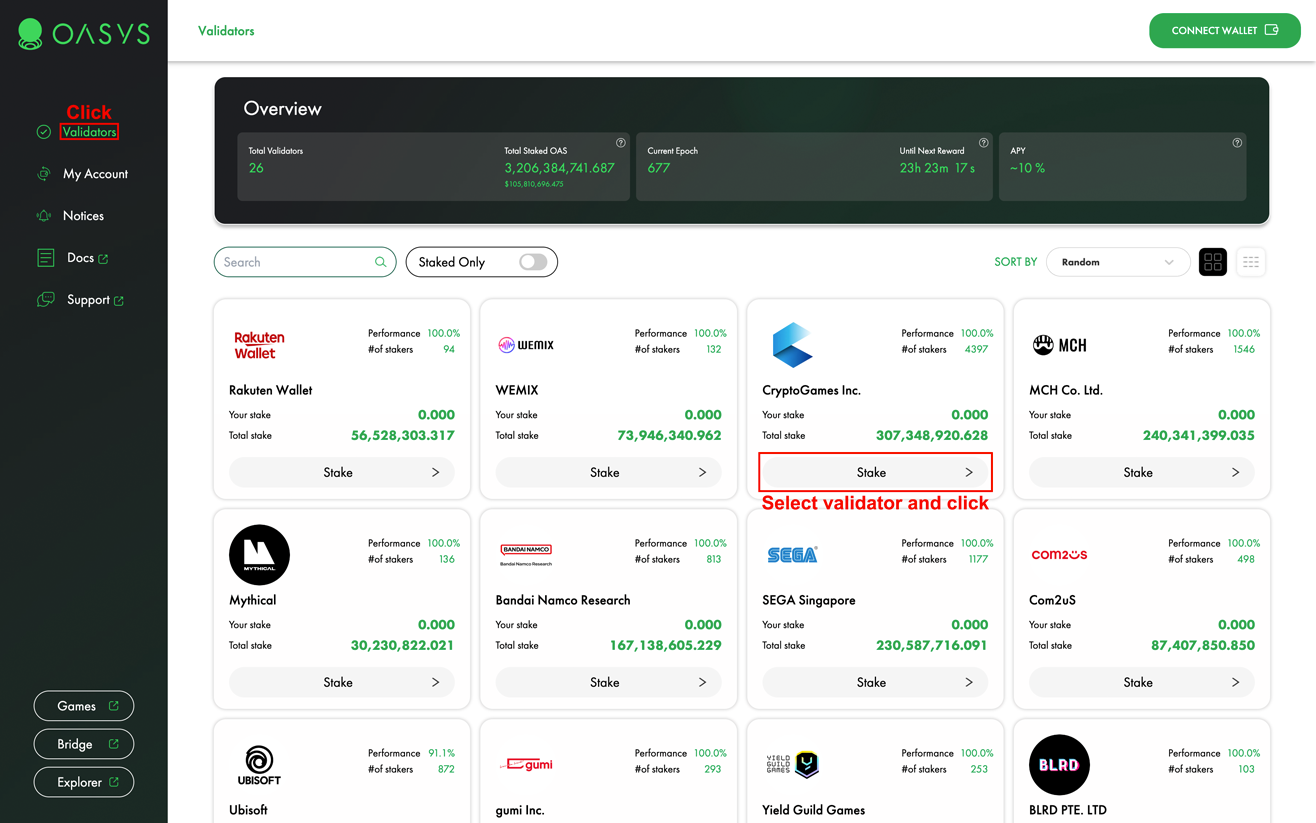
Open the Validators page, select a validator, and click Stake.
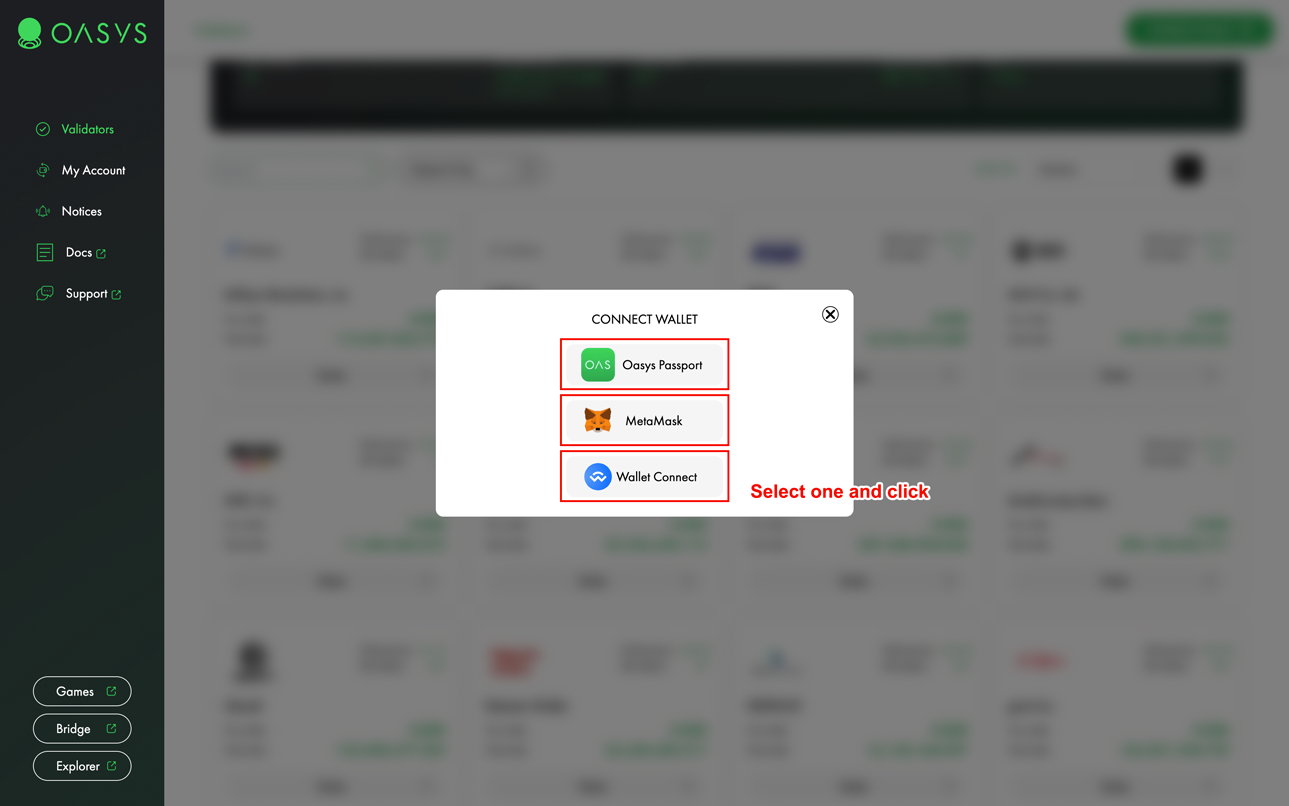
Validators page
Step 2

Select the wallet you want to connect.

Wallet selection modal
Step 3

Enter the stake amount, select the token, and click Stake.

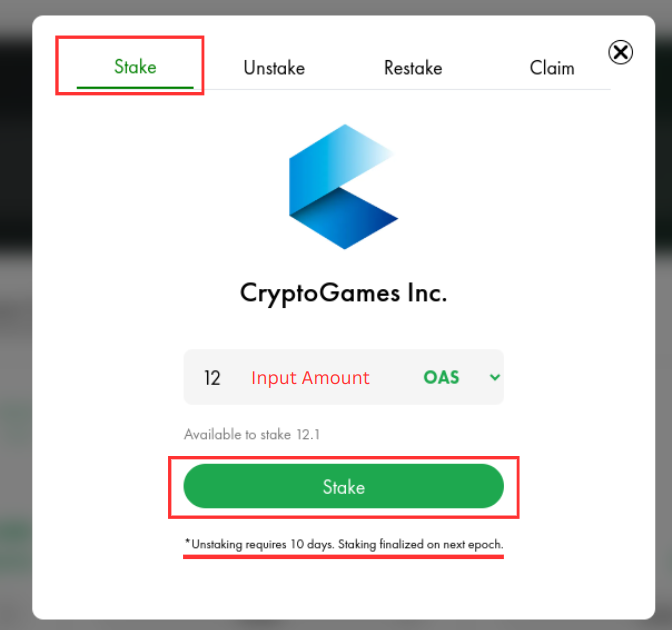
If you want to stake most of your available OAS, leave enough OAS in your wallet to pay the transaction gas fee.

Stake modal

2. Unstake

Step 1

Open the Validators page and select a validator you have staked with.

Validators page
Step 2

Enter the unstake amount, select the token, and click Unstake.

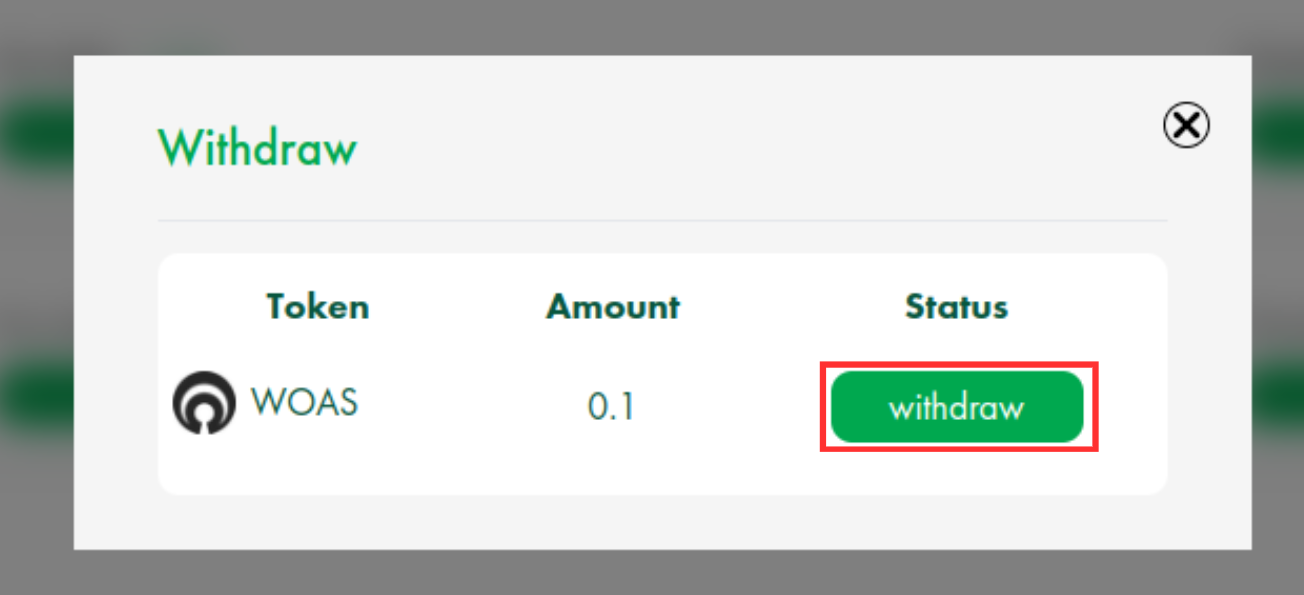
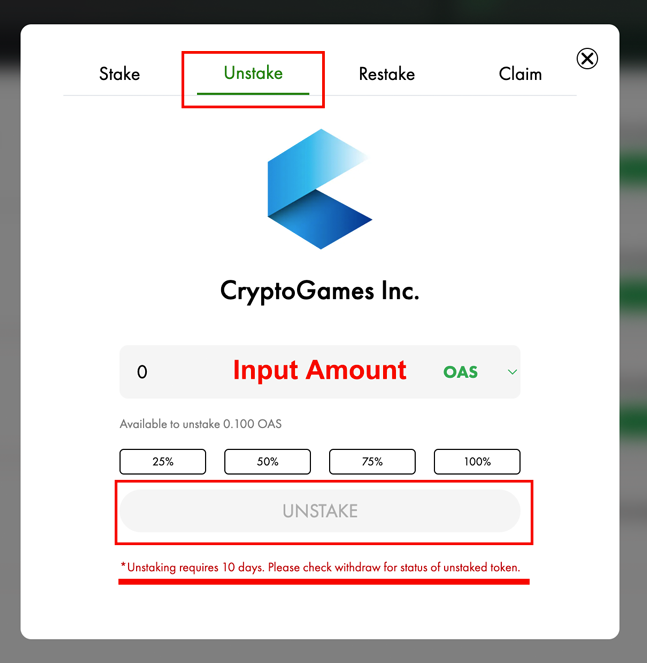
Tokens unstaked from a validator become withdrawable 10 days after the Unstake transaction.

Unstake modal

3. Restake

Step 1

Open the Validators page and select a validator you have staked with.

Validators page
Step 2

Click Restake to stake your claimable rewards again.

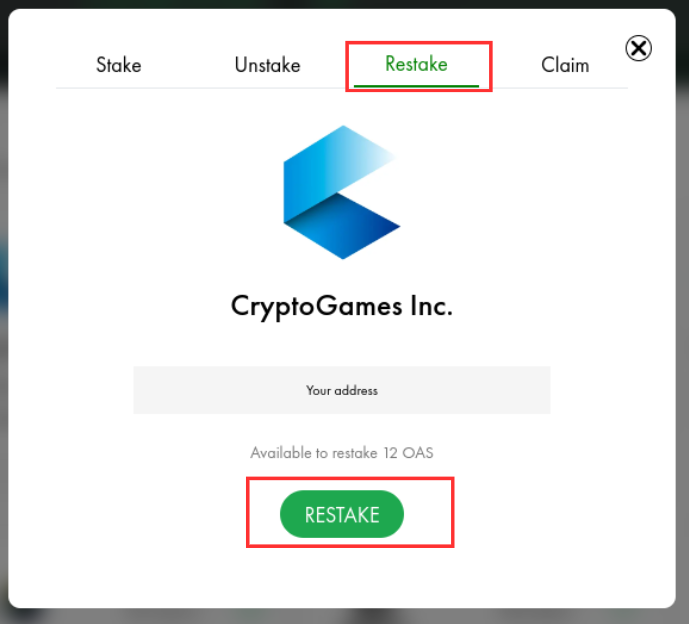
After the transaction is confirmed, the restaked amount is reflected in your staking position.

Restake modal

4. Claim

Step 1

Open the Validators page and select a validator you have staked with.

Validators page
Step 2

Click Claim to receive claimable staking rewards.

Claim modal

5. Withdraw

Step 1

Open the My Account page and click Withdraw.

My Account withdrawal area
Step 2

After 10 days have passed since the Unstake transaction, click withdraw for each withdrawable token.

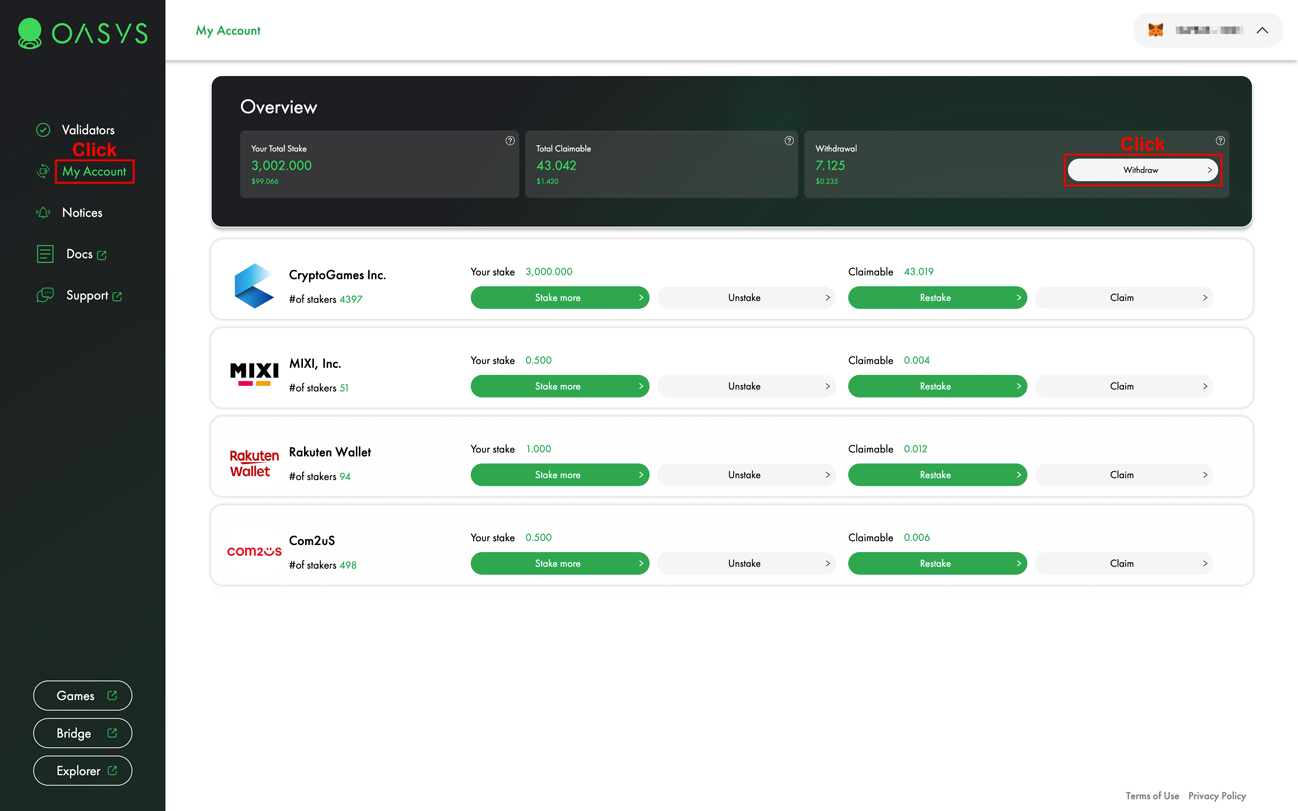
You can check the remaining time until each token becomes withdrawable. Tokens waiting to be withdrawn do not receive staking rewards.

Withdraw modal